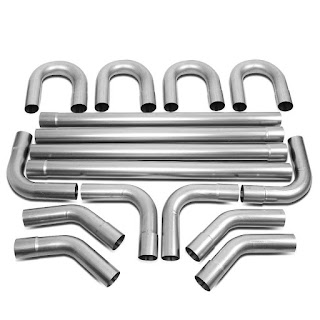
The exhaust pipe is one of the most rust-prone parts of any vehicle, especially in Harley exhaust systems. Whether you’re a Harley-Davidson enthusiast or a casual rider, maintaining your bike’s exhaust system is crucial for both performance and aesthetics. One of the most effective ways to protect and enhance your exhaust pipe is by using exhaust paint. This specialized paint not only prevents rust but also improves the overall appearance of your bike. In this guide, we’ll explore why painting your exhaust pipe is important, when it works best, and how to do it properly.
The Importance of Exhaust Paint for Harley Exhaust Systems
1. Protection Against Rust
Harley exhaust systems are often exposed to harsh conditions, including moisture, road salt, and extreme temperatures. Over time, these factors can cause the exhaust pipe to rust, leading to costly repairs or replacements. Applying exhaust paint creates a protective barrier that shields the pipe from rust and corrosion, significantly extending its lifespan.
2. Enhanced Aesthetics
A well-painted exhaust pipe can transform the look of your Harley. Whether you prefer a sleek black finish, a metallic silver, or a custom color, exhaust paint allows you to customize your bike’s appearance. This is especially important for Harley owners who take pride in the visual appeal of their motorcycles.
3. Heat Resistance
Harley exhaust systems operate at extremely high temperatures, often exceeding 500°C. Regular paint would quickly peel or burn off under these conditions, but exhaust paint is specifically designed to withstand high temperatures. This ensures that the paint remains intact and continues to protect the pipe even during long rides.
When Does Exhaust Pipe Painting Work?
1. Material Matters
Painting is most effective on steel exhaust pipes that have been properly cleaned and prepped. Stainless steel pipes, while more resistant to rust, may not benefit as much from painting. However, if you’re looking to change the color or add an extra layer of protection, exhaust paint can still be a good option.
2. High-Temperature Resistance
For Harley exhaust systems, it’s essential to use exhaust paint that can withstand long-term exposure to high temperatures. Look for paints rated for at least 500°C to ensure they can handle the heat generated by your bike’s exhaust.
3. Proper Surface Preparation
The key to a successful paint job is proper surface preparation. Before applying exhaust paint, make sure the pipe is free of rust, oil, and debris. Sanding the surface lightly can help the paint adhere better and last longer.
4. Correct Application and Drying
After painting, it’s important to let the paint dry and cure properly. Running the engine for a few minutes can help the paint set and form a durable finish. Avoid riding the bike until the paint has fully cured to prevent smudging or peeling.
When Does Exhaust Pipe Painting Fail?
1. Poor Surface Preparation
If the exhaust pipe is oily, rusty, or dirty, the paint won’t adhere properly. This can lead to peeling, flaking, or uneven coverage. Always clean and prep the surface thoroughly before applying exhaust paint.
2. Using the Wrong Paint Type
Regular paint or even some high-temperature paints may not be suitable for Harley exhaust systems. These paints may not withstand the extreme heat and harsh conditions, causing them to burn off or degrade quickly. Always choose exhaust paint specifically designed for automotive use.
3. Applying Thick Coats
Applying too much paint at once can lead to drips, bubbles, or uneven drying. Thin, even coats are the best way to achieve a smooth and durable finish.
Best Practices for Painting Harley Exhaust Systems
1. Clean the Pipe Thoroughly
Start by cleaning the exhaust pipe with a degreaser to remove any oil or dirt. Use a wire brush or sandpaper to remove rust and create a slightly rough surface for better paint adhesion.
2. Choose the Right Exhaust Paint
Select a high-quality exhaust paint that is specifically designed for high-temperature applications. Look for products that are resistant to heat, chemicals, and environmental factors.
3. Apply Thin, Even Coats
Apply the paint in thin, even coats using a spray can or brush. Allow each coat to dry completely before applying the next. Most exhaust paints require 2-3 coats for optimal coverage and protection.
4. Cure the Paint Properly
After the final coat, let the paint cure according to the manufacturer’s instructions. Some paints may require heat curing, which can be done by running the engine for a short period. This step ensures that the paint forms a durable, long-lasting finish.
Additional Tips for Maintaining Harley Exhaust Systems
- Regular Inspections: Check your exhaust system regularly for signs of rust, damage, or wear. Early detection can prevent more serious issues down the line.
- Seasonal Maintenance: Before storing your Harley for the winter, consider applying a fresh coat of exhaust paint to protect the pipes during periods of inactivity.
- Upgrades and Modifications: If you’re upgrading your Harley exhaust systems, take the opportunity to paint the new components for added protection and a customized look.
Conclusion
Painting your exhaust pipe with exhaust paint is a simple yet effective way to protect and enhance your Harley exhaust systems. By following the best practices outlined above, you can prevent rust, improve aesthetics, and extend the life of your bike’s exhaust system. Whether you’re a DIY enthusiast or a professional mechanic, investing in high-quality exhaust paint is a smart choice for any Harley owner. So, grab your tools, choose the right paint, and give your Harley the care it deserves!
